Concept:
As this was my first DIY amplifier I decided I need to create something easy to assemble yet good sounding. I started to plan the build. After some reading I decided to use the schematic posted by Alex Wong for 2x LM3886 per channel in parallel
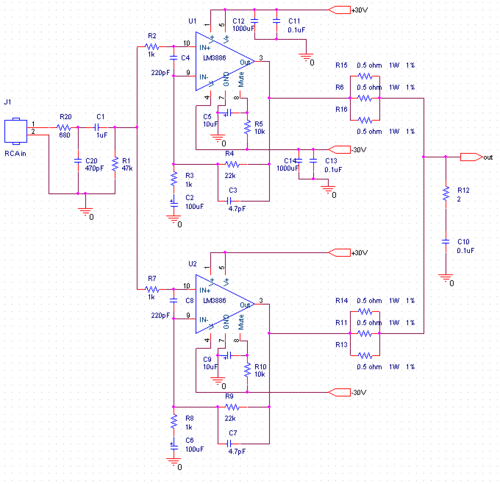
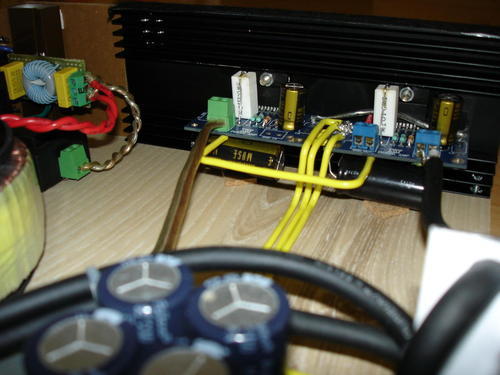
A DC speaker protection circuit is added and therefore I needed another small transformer to power it. I also added and EMI filter before the transformers which greatly reduced the hum I can hear from the speakers.
PSU:
As this is not a top-notch sonic quality amplifier I decided not to spend a fortune on the PSU. I also think that this particular amplifier won’t sound much different with a regulated PS. I don’t have schematics for the PS, but it’s just a 400VA 2x25VAC toroidal transformer > 2x 20A rectifiers with each diode shunted with a 10nF cap > 8x 4700uF 50V Low-ESR caps. If you decide to build a Gainclone I can tell you that the filter capacitors in the PSU have tha largest impact on the sound characteristics of the amplifier so be sure to experiment a bit with their capacity/type. All AC cables are twisted to reduce noises. The yellow DC cables are made of 1.5mm2 solid core OFC.
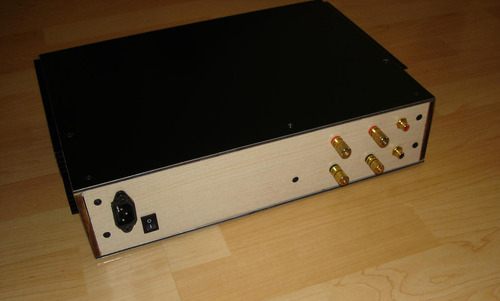
Enclosure:
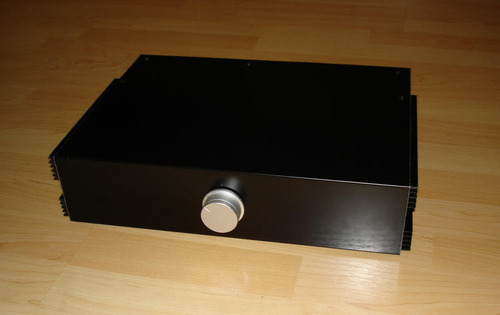
I really wanted a good and solid enclosure which still doesn’t look like most of the DIY amplifiers I see on the internet. I really liked the enclosures Alex Wong uses in his projects, especially BPA300, but I really didn’t feel like paying 100$ for an enclosure of a 100$ amplifier… So I decided to DIY a bit. The floor and the right side of the box are cut from leftovers of a laminate flooring from my apartment using a regular cutting saw table and then put together using little aluminium profille that I had lying around. The heatsinks are then screwed to the lower panel.
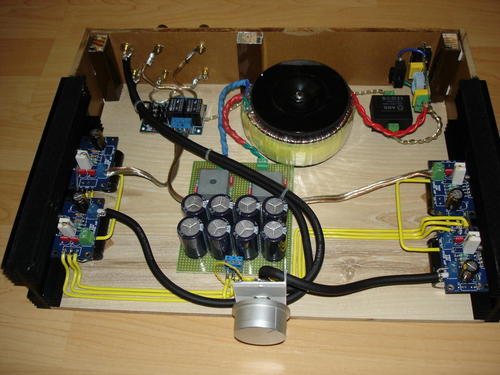
The upper/lower/front panel is made of a bent material called Etalbond but black or white plexiglass will look even better. As you can see the potentiometer is put on a L-shaped piece of aluminium bolted to the wood panel and it’s shaft goes through a hole in the front side of the Etalbond/Plexiglass panel.
Conclusion:
I had a great fun building this amplifier and I recommend it to beginner/intermediate users of the DIY audio scene. It sounds good, especially with a tube preamplifier. I’m sure you don’t expect that sound from a chipamp, but LM3886 and LM1875 are really good. I gave this amplifier to my brother as a present because I am planning to build my next solid-state amplifier in the next few days. Thank you for reading, now grab the soldering iron and do something cool!