After searching for some time on the Internet on how to downgrade a 60GB PS3 with the COK-002 board, I couldn’t find a guide which explains which testpoint on the COK-002 that is in my PS3 corresponds to the appropriate NAND chip leg. The only thing I could find is that I can use a NAND CLIP to read/write the NANDs but I didn’t feel like giving 60$ and waiting 15 days for a NAND clip that I will use only once.
There are 2 images I found showing which testpoint corresponds to every pin of the Progskeet v1.2 board and the same image for the Infectus board, but I could not find such an image for the Teensy++ 2.0, so I used the image for the Progskeet, along with an image of which Progskeet pin(GP1 etc.) corresponds to which NAND chip pin name (WP, ALE, CLE, I/O1 etc.) to create a diagram of which testpoint on the mainboard goes to which leg of the NAND chips made by Samsung.
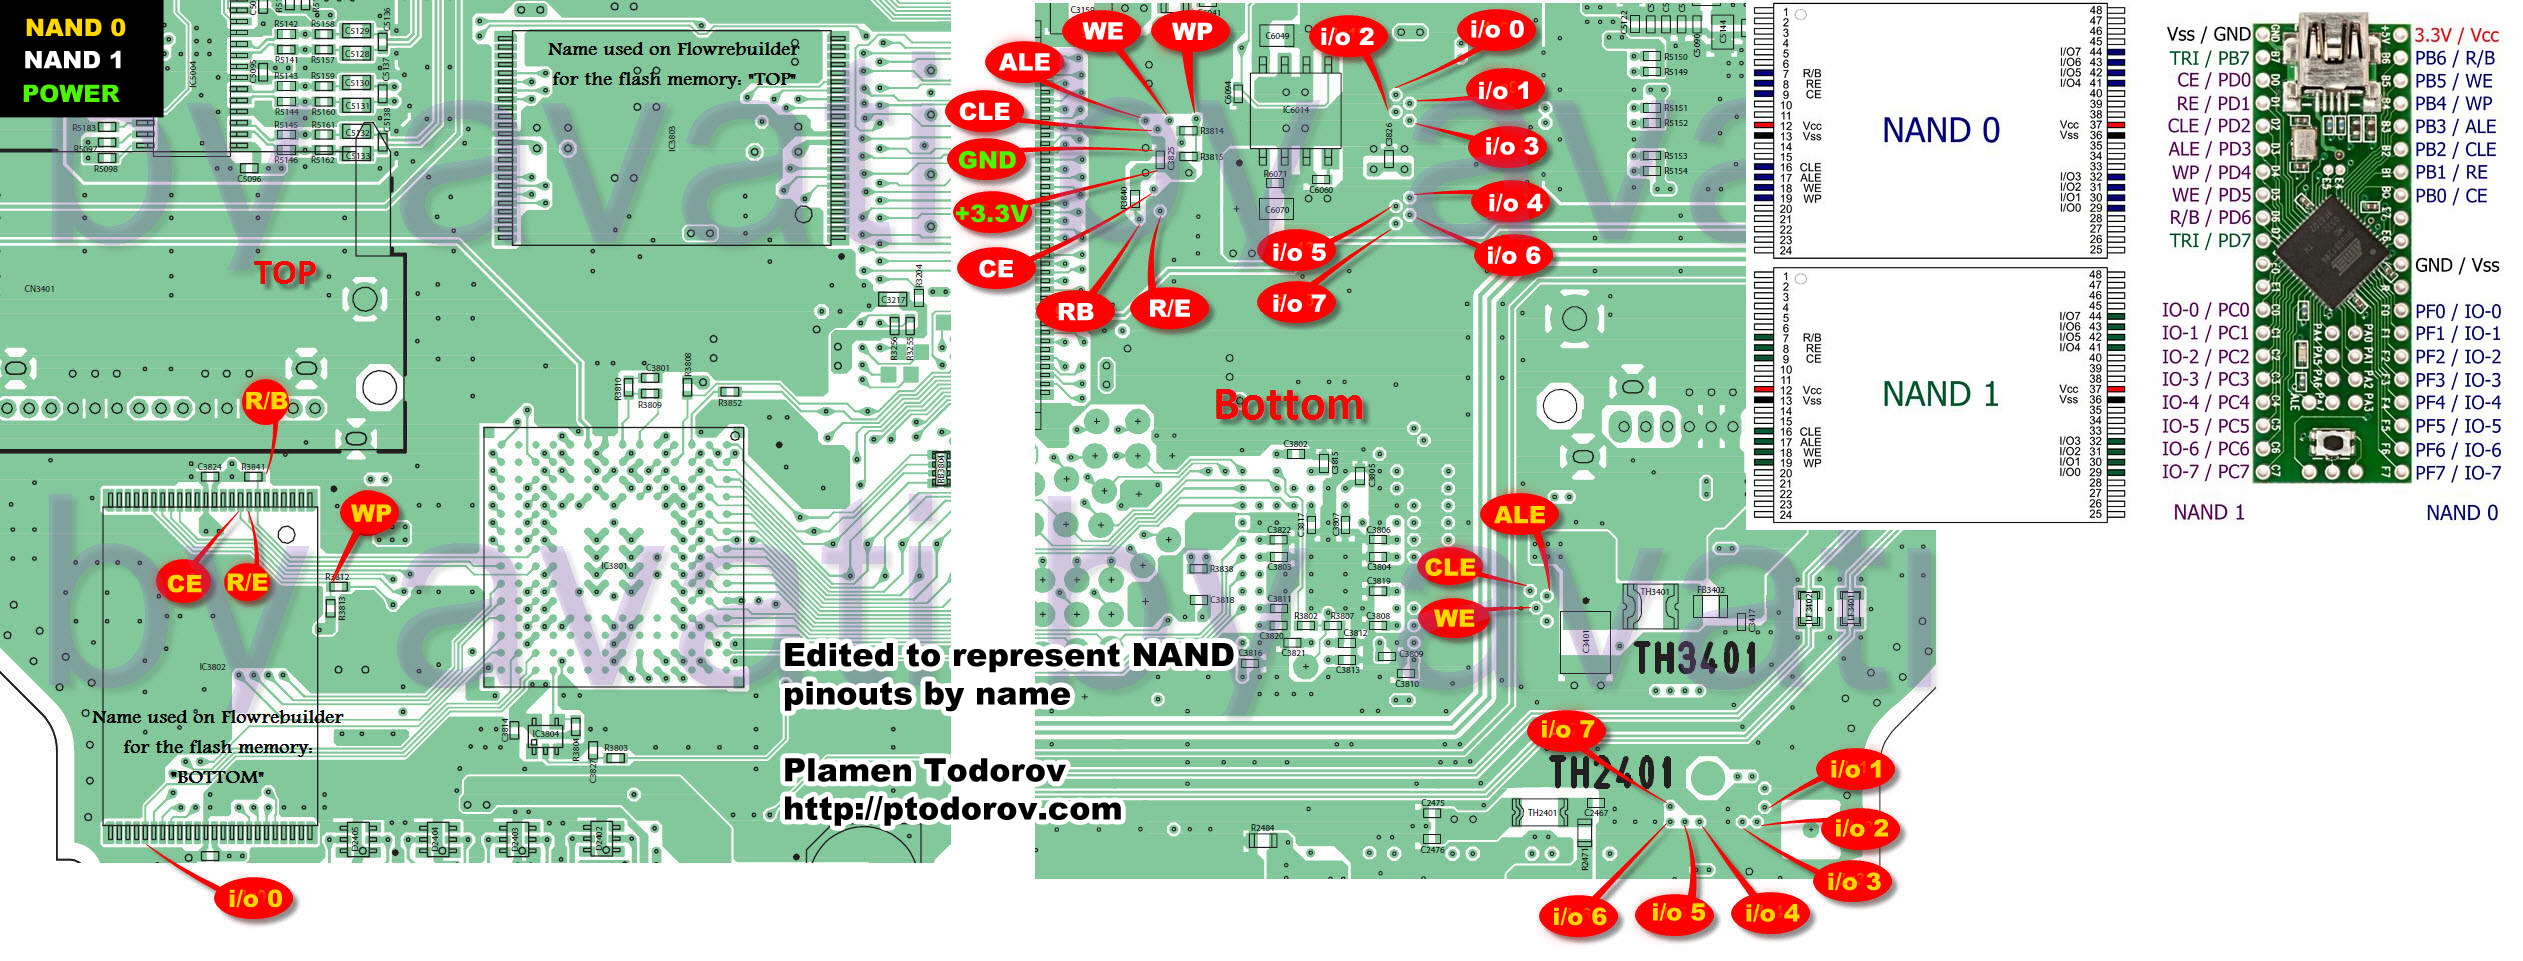
CLICK ON THE IMAGE FOR BETTER RESOLUTION
So now you can use this diagram not only for downgrading/dumping/writing the NANDs with a Teensy++ 2.0 board, but with any other board available on the Internet.
Important!
You must provide a stable 3.3V PSU to both the PS3 board and the Teensy, and don’t forget to unite the GNDs. You can use any PSU which outputs 3.3V @ 1.8A+, the easiest option will be to use a PC PSU.
Short list of the downgrading procedure:
- Prepare your Teensy++ 2.0 by using the teensy_loader applications to flash the NANDway .hex file into it
- Install Python for Windows and PYserial
- Find out which COM port does the new Teensy NANDway use by opening the Device Manager and looking into the Ports(COM&LPT) category
- Take apart your PS3 using one of the million videos online for reference
- Very carefully solder all the wires according to the diagram above
- Solder the other end of all the wires to the teensy board
- Find a 3.3V 1.8A+ PSU and solder it to the PS3 mainboard(see the diagram) and to the Teensy++ 2.0
- Solder the Teensy++ 2.0 GND to the PS3 mainboard GND
- Now on your PC, with the PSU on, the USB cable connected to the Teensy++ 2.0 board run the NANDway python script by issuing the following command in CMD: “NANDway.py COM4”, where COM4 will be the port number you seen in the Device Manager.
- You’re done 🙂
Tools used to dump/downgrade/write the NAND chips: